HTTP2使用示例
更新时间:2018-10-09 11:19:46
简介
本文档描述了使用HTTP2完成本地文件上传到工业平台的demo的具体情况。
步骤
获取linkkit SDK代码
目前该代码已经在AliOS Things Github上可见,获取该代码以后,在仓库根目录执行如下命令创建linkkit sdk export目录:
aos make export_linkkit_sdk
执行上述命令结束,生成的linkkit sdk代码位于out/export/linkkit-sdk-c。 转到该目录中,我们查看位于该目录下的example文件列表
examples/
├── app_entry.c
├── app_entry.h
├── cJSON.c
├── cJSON.h
├── CMakeLists.txt
├── coap
├── iot.mk
├── linkkit
└── mqtt
该目录下已经包含maqtt和linkkit两个实例,我们增加一个http2文件夹,并将附件压缩包解压之后其中的http2-example.c拷入其中
download: http2.7z
修改后的目录如下:
examples/
├── app_entry.c
├── app_entry.h
├── cJSON.c
├── cJSON.h
├── CMakeLists.txt
├── coap
│   └── coap_example.c
├── http2
│   └── http2-example.c
├── iot.mk
├── linkkit
│   ├── data
│   ├── linkkit_example_cntdown.c
│   ├── linkkit_example_gateway.c
│   ├── linkkit_example_sched.c
│   ├── linkkit_example_solo.c
│   └── newapi
└── mqtt
    ├── app_entry.c
    ├── app_entry.h
    ├── k_app_config.h
    ├── mqttapp.mk
    ├── mqtt_example.c
    ├── mqtt_example_multithread.c
    ├── mqtt_example_rrpc.c
    ├── readme.txt
    └── ucube.py
打开http2 demo的编译使能
- 修改位于examples下的iot.mk,如下 ```diff ...
@@ -52,10 +52,10 @@ endif
SRCS_http-example := http/http-example.c
endif
-# ifneq (,$(filter -DHTTP2_COMM_ENABLED,$(CFLAGS)))
-# TARGET += http2-example
-# SRCS_http2-example := http2/http2-example.c
-# endif
+ifneq (,$(filter -DHTTP2_COMM_ENABLED,$(CFLAGS)))
+TARGET += http2-example
+SRCS_http2-example := http2/http2-example.c
+endif
ifneq (,$(filter -DSUBDEVICE_ENABLED,$(CFLAGS)))
TARGET += subdev-example
2. 在make.settings增加如下内容
```plain
##
## FEATURE_HTTP2_COMM_ENABLED
## Brief:    HTTP/2(Hypertext Transfer Protocol 2.0) is a major revision of the HTTP network protocol used by the World Wide Web
## Usage:    If the value is "y", it support http/2 protocol and the HTTP2_COMM_ENABLED compile option will be defined
## Note:     Switchable (value is y or n)
##
FEATURE_HTTP2_COMM_ENABLED  = y
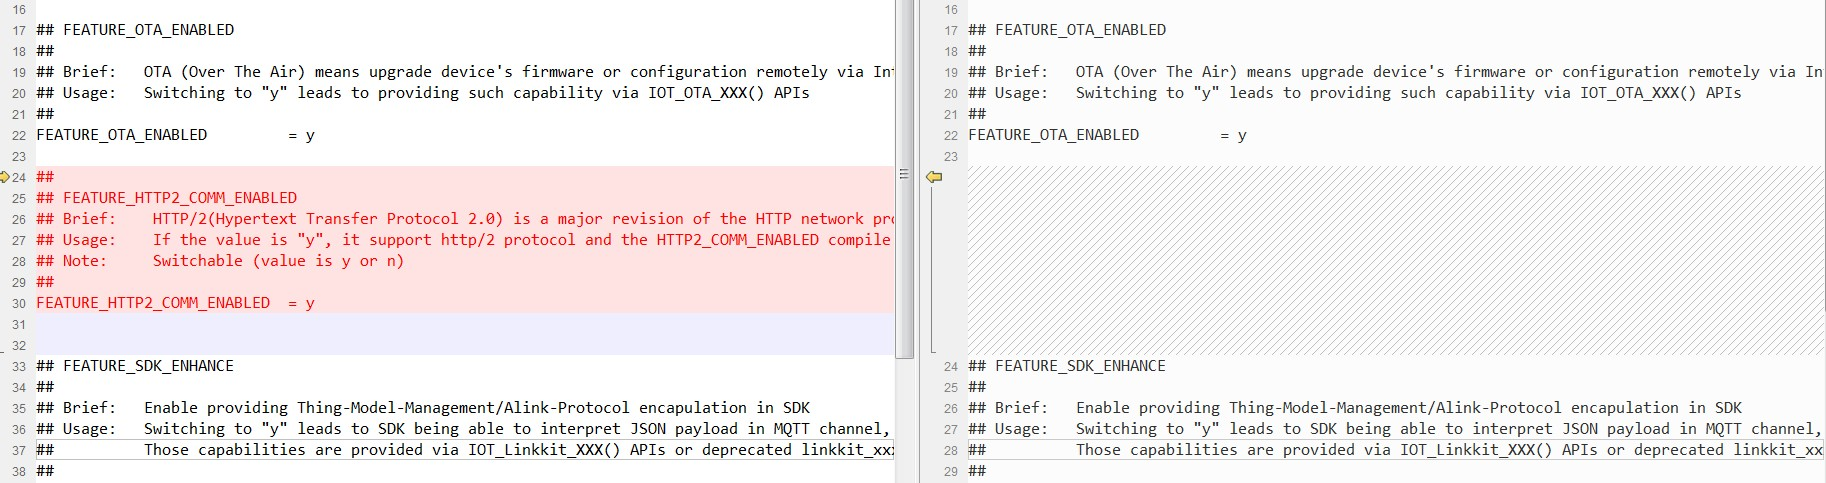
增加后对比之前如下:
编译生成固件
以编译和运行平台Ubuntu LTS 16为例,介绍如何编译生成固件。
编译之前,需要做简单设置。
修改examples/mqtt/app_entry.h
我们此次目标是编译生成http2-example, 然而目前执行编译会一次性编译所有例程,其中的mqtt编译例程或许有点问题,我们将上述头文件中引用"aos/aos.h"的部分注释掉。修改三元组
在examples/http2/http2-example.c中,修改其中的三元组,存放在HTTP2_PRODUCT_KEY HTTP2_DEVICE_NAME HTTP2_DEVICE_SECRET
三元组获取方式可以参考下一章节。使用如下命令进行编译,即获取可执行文件
make distclean
make
我们查看下编译出来的固件列表,其中有我们要用到的 http2-example
output/release/bin/
├── http2-example
├── linkkit-example-countdown
├── linkkit-example-sched
├── linkkit-example-solo
├── linkkit_tsl_convert
├── mqtt-example
├── mqtt-example-multithread
├── mqtt-example-rrpc
└── sdk-testsuites
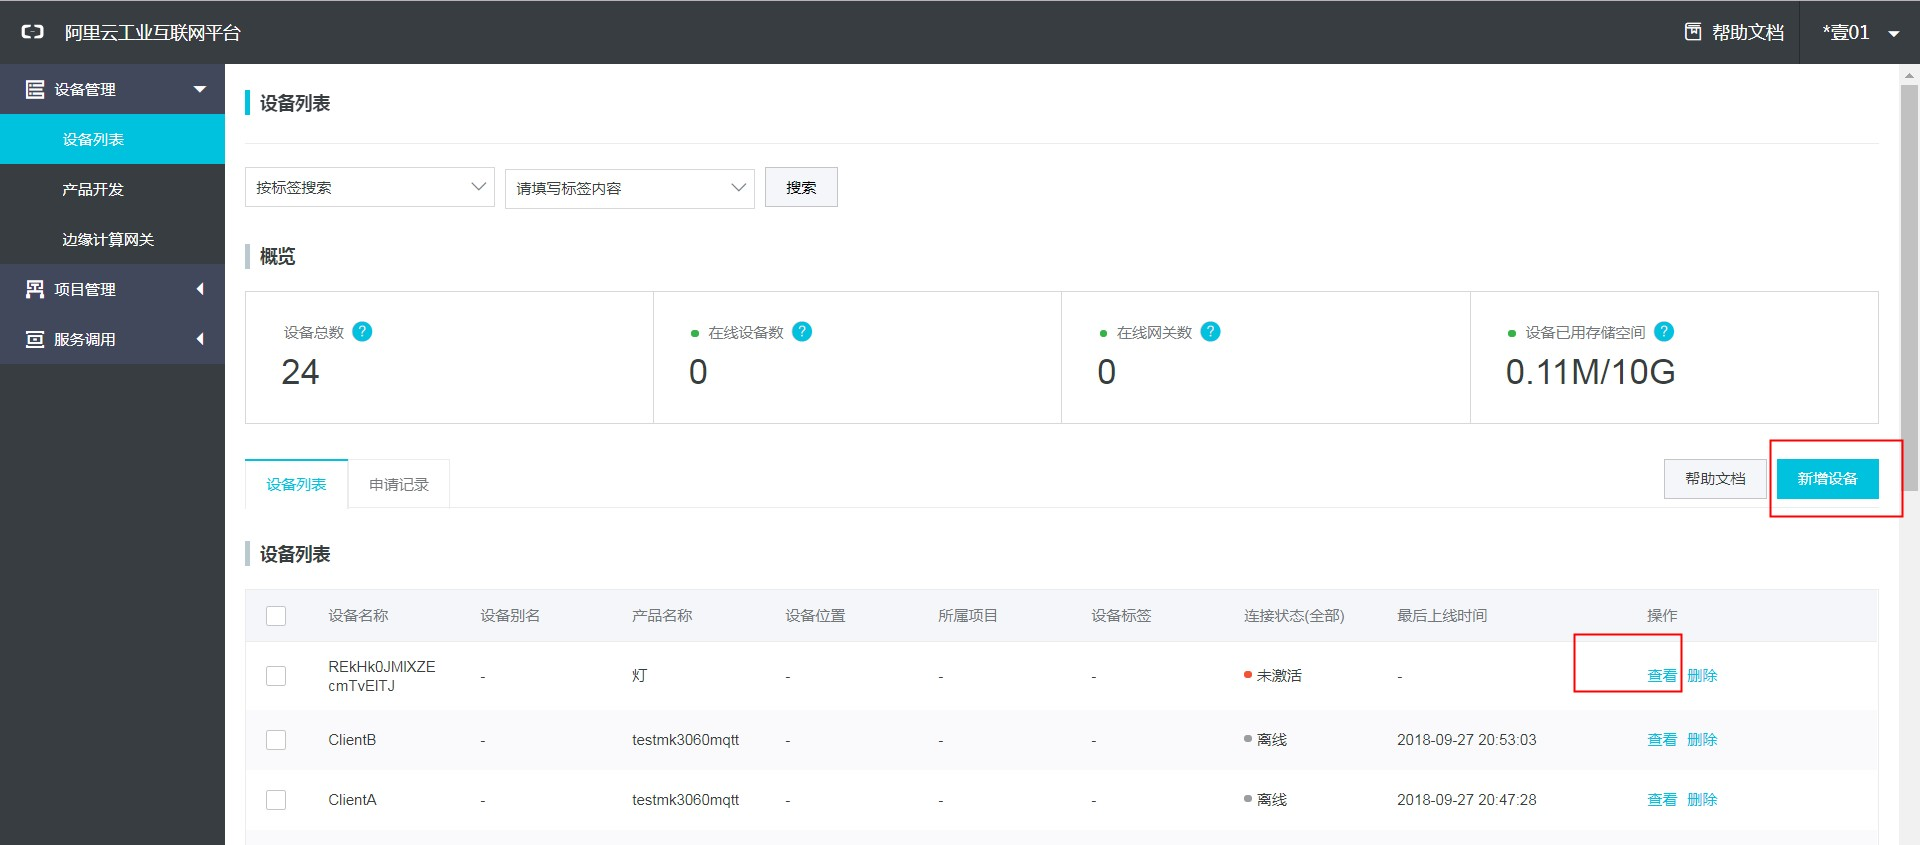
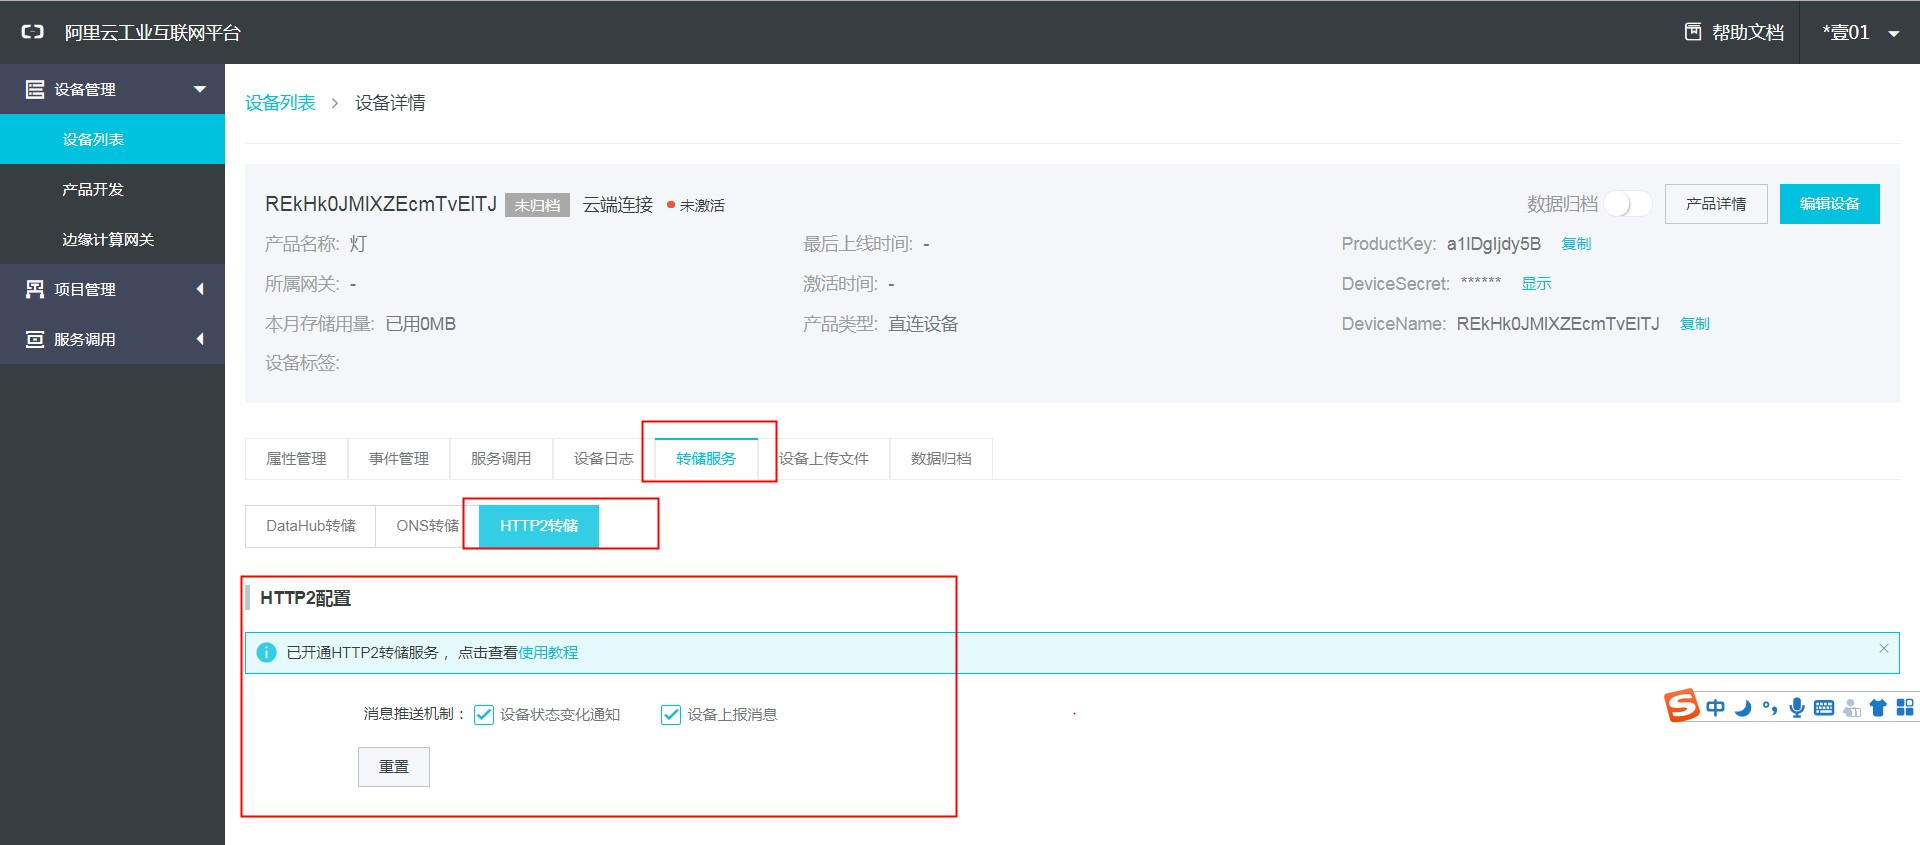
在工业物联网平台创建三元组并设置支持http2权限
工业物联网平台https://linkindustry.aliyun.com/创建账号及项目之后,进入如下界面创建设备及获取三元组
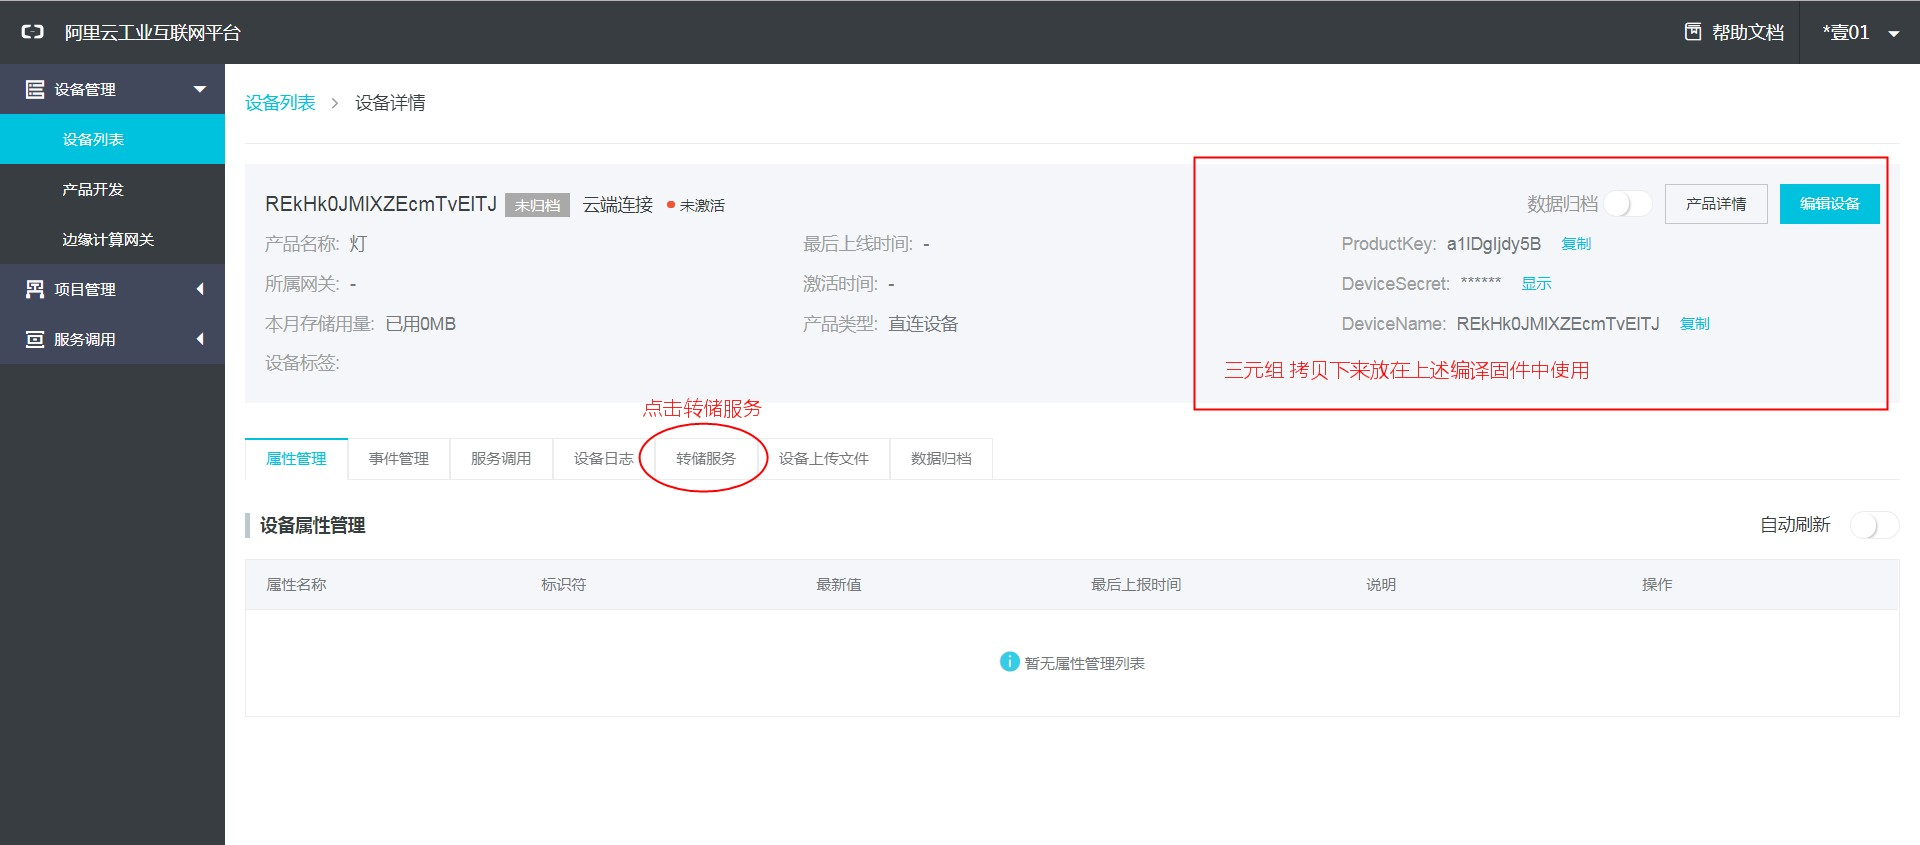
点击上述转储服务之后,启动http2服务,如下图
运行测试
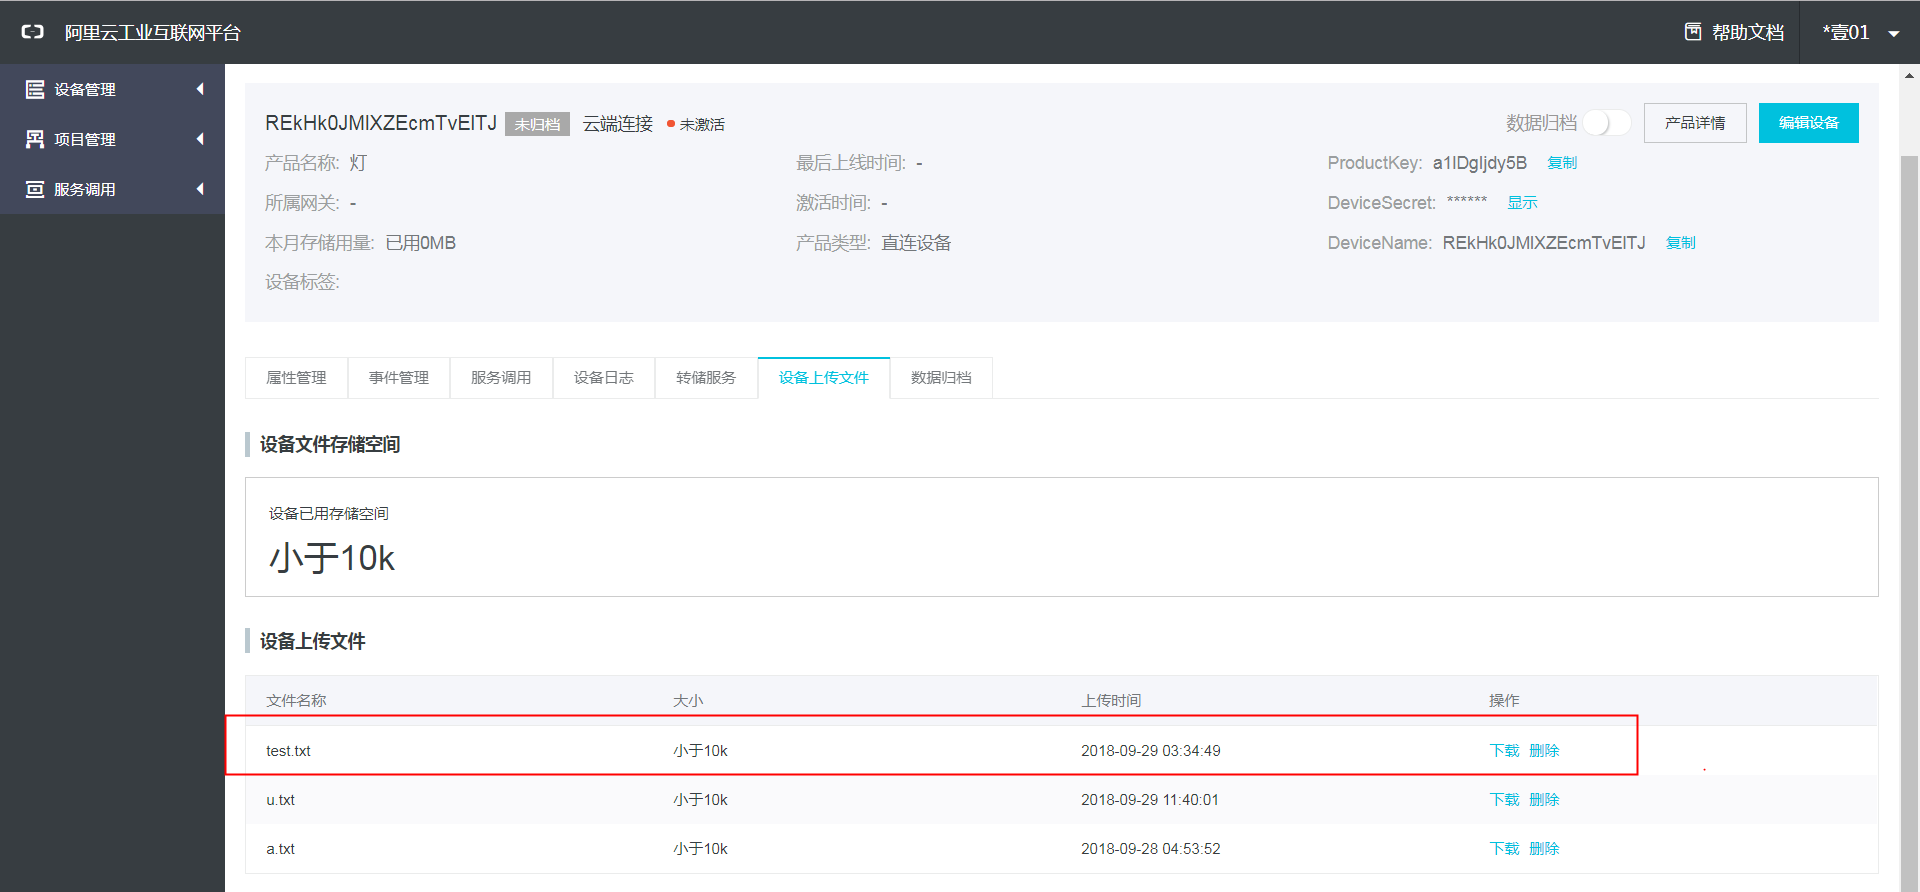
demo代码支持单独上传一个文件,或者同时上传一个文件及一个日志文件。日志文件上传只有在设备端为网关设备时才能在云端通过“边缘日志</span>”界面获取,我们这里仅介绍单个文件上传。预期执行成功后,该文件会在云端“设备上传文件”Tab中观察到。
以已创建好的1个文本文件a.txt为例,如下执行
root@shineg-VirtualBox:/home/shineg/sda4/AliOS-Things/out/export/linkkit-sdk-c# vi test.txt
root@shineg-VirtualBox:/home/shineg/sda4/AliOS-Things/out/export/linkkit-sdk-c# ./output/release/bin/http2-example test.txt
其中运行成功标志的日志

转到云端去查看此文件,确认上传内容无误。