基于 Node.js + Express
更新时间:2018-07-03 23:41:08
本文将以开发一个 RGB智能灯的服务端应用为例,介绍第三方服务端应用的开发过程,方案基于 Node.js 和 express 框架。
前期准备
软件安装
安装 Node.js LTS 版本(>=8.9):https://nodejs.org/zh-cn/
文本编辑器:VSCode / Sublime / Vim...
开发过程
初始化应用目录
一、安装 Express 应用生成器,执行:
npm install -g express-generator
二、创建应用目录,执行:
express rgb-light
完成目录创建:

进入项目目录并安装依赖:
cd rgb-light
npm install
三、 启动应用本地调试服务
在项目目录下执行:
npm run start

四、访问应用
用浏览器访问:
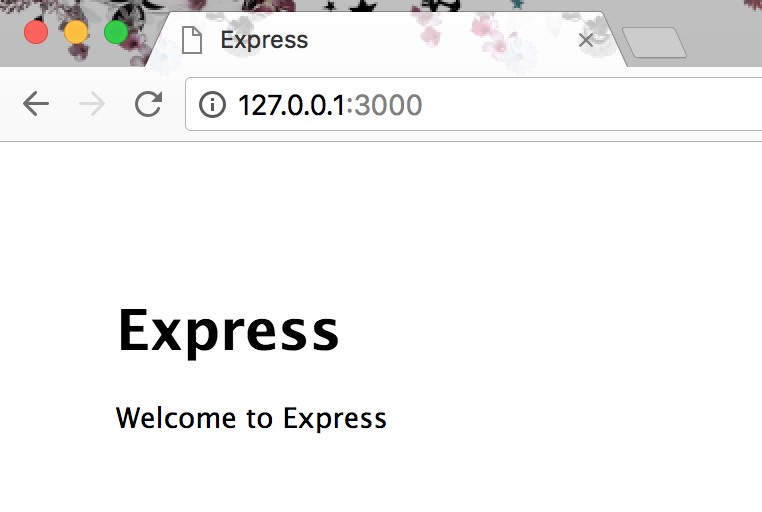
http://127.0.0.1:3000/
可以看到页面上输出了 “Welcome to Express”:
PS:由于Express比较灵活,模板引擎选用可能不一致,可根据实际项目需要进行相应的修改。本教程中使用的模板引擎是express-generator自动生成使用的Jade。
代码开发
一、安装 aliyun-api-gateway ,在项目目录执行:
npm install --save aliyun-api-gateway
二、添加配置项
在 public/javascript目录新增gateway.js 文件,将前一步申请到的 AK、AS 添加到配置项,方便后续使用,然后配置aliyun-api-gateway, 代码如下:
const Client = require('aliyun-api-gateway').Client;

const config = (appInfo => {
  const config = exports = {};

  // use for cookie sign key, should change to your own and keep security
  config.keys = appInfo.name + '_1526880651009_8352';

  // 配置 appKey、appSecret
  config.appKey = '24900114';
  config.appSecret = 'b36854ed91674b0da7fbfa59514ef2e5';

  return config;
})('yourAppName');

module.exports ={
  getClient() {
    if (!this.client) {
      // 使用配置中的 AppKey 以及 AppSecret 创建阿里云 API 网关 Client
      this.client = new Client(config.appKey, config.appSecret);
    }
    return this.client;
  },

  post: async function(apiPath, apiVer, params) {
    const client = this.getClient();
    let response = null;
    try {
      // LinkDevelop 平台的 URL 为 http://api.link.aliyun.com
      // 该地址可以在 LinkDevelop 平台的资源管理》官方服务中通过查看 API 详情得到
      const apiurl = 'https://api.link.aliyun.com' + apiPath;
      const payload = {
        data: {
          id: new Date() * 1 + '',
          version: '1.0',
          request: {
            apiVer: apiVer || '',
          },
          params,
        },
      };
      response = await client.post(apiurl, payload);
    } catch (error) {
      console.error('API Response Error', error);
      response = error;
    }
    return response || {};
  }
}
新增 light.js文件,用于表示我们的 rgb-light,记得将 productKey 和 deviceName 换成设备开发步骤中的测试设备,并保证设备在线(例如打开 http://web-device.oss-cn-hangzhou.aliyuncs.com/index.html 这个页面,并保持设备上线):
var apiclient = require('./gateway');
var express = require('express');
var app = express();

// 设备 id 使用设备开发中注册的测试设备,并保持设备在线
const thingId = {
  productKey: 'a1YfvmKLmXP', //<productKey>
  deviceName: 'A4Wi85YYXlM3a7pKPB8T' // <deviceName>
};

module.exports = {
  getProperties: async function() {
    // 获取设备属性
    const ret = await apiclient.post(
      '/thing/device/properties/query',
      '1.1.0',
      thingId
    );
    var info = '';
    const properties = {};
    if (ret.code !== 200) {
      info = ret.localizedMsg || ret.message || '连接服务器失败';
    } else {
      info = '已连接到服务器';
      properties = ret.data && ret.data[0] && ret.data[0].value;
      console.log(properties);
      // 设置到程序中
      app.locals.properties = properties;
    }
    // 数据整理并返回
    return {
      info: info,
      color: {
        Red: (properties && properties.Red) || '',
        Green: (properties && properties.Green) || '',
        Blue: (properties && properties.Blue) || ''
      }
    };
  },
  setProperties: async function(properties) {
    var prop = Object.assign({}, properties);
    // 设置设备属性
    const ret = await apiclient.post('/thing/device/properties/set', '1.1.0', {
      ...thingId,
      properties: {
        RGBColor: prop
      }
    });
    console.log(ret);
    var info = '';
    if (ret.code !== 200) {
      info = ret.localizedMsg || ret.message || '设置失败';
    } else {
      info = '设置成功';
      // 设置到本地配置中
      app.locals.properties = properties;
    }
    // 数据整理并返回
    return {
      info: info,
      color: {
        Red: (properties && properties.Red) || '',
        Green: (properties && properties.Green) || '',
        Blue: (properties && properties.Blue) || ''
      }
    };
  }
};
三、修改 views/index.jade 模板文件,写入模板内容:
extends layout

block content
  h1= title
  p #{info}
  form(id='lightEdit',method='post',action='/')
    p R:
      input(id="red", name ='Red', value='#{color && color.Red || ""}')
    p G:
      input(id="green", name = 'Green', value= '#{color && color.Green || ""}')
    p B:
      input(id="blue", name='Blue',  value='#{color && color.Blue || ""}')
    input(type='submit' class='setButton' value='set')
三、修改 routes/index.js 文件,读取服务器端的配置内容:
var express = require('express');
var router = express.Router();
var light = require('../public/javascripts/light.js');
/* GET home page. */
router.get('/', function(req, res, next) {
  var lightData = light.getProperties();
  lightData.then(resolve => {
    res.render('index', { title: 'RGB light', info: resolve.info, color: resolve.color});
  }).catch(err => {
    console.error(err);
    res.render('index', { title: 'RGB light', info: err, color: err.color});
  })
});

module.exports = router;
四、修改 app.js文件,监听提交的 form表单(其中 jade模板中 form的action路径要跟 app.use的路径一致,本例中为“/”):
//加在文件顶部
var light = require('./public/javascripts/light');

//....

//加在module.exports = app; 前面
app.post('/', function(req, res, next){
  var prop = {};
  for (const key in req.body) {
    if (req.body[key]) {
      prop[key] = parseInt(req.body[key], 10);
    }
    else {
      prop[key] = app.locals.properties && app.locals.properties[key] || '';
    }
  }
  light.setProperties(prop).then( resolve => {
    res.render('index', { title: 'RGB light', info: resolve.info , color: resolve.color});
  });
});
用浏览器访问页面:
http://localhost:3000/
就能看到如下界面,说明设备的属性值已经获取成功了(如果没有设置过数据,R G B 可能显示为空值):
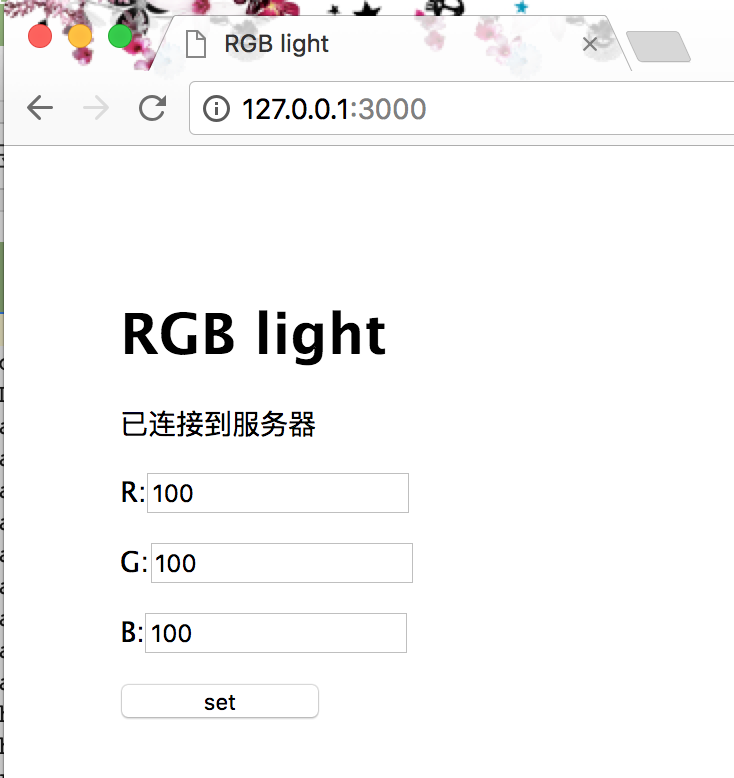
我们把输入框中的属性值改成其他值之后,点击"set"按钮:
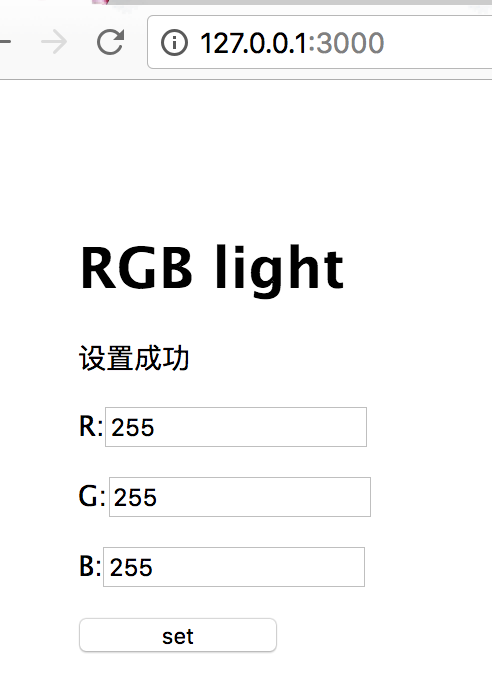
点击“设置属性”按钮,待页面刷新后,观察测试设备的日志接收情况,这里以 Web Device 模拟设备为例,可以看到 Web Device 模拟设备成功接收到到云端设置属性的消息:
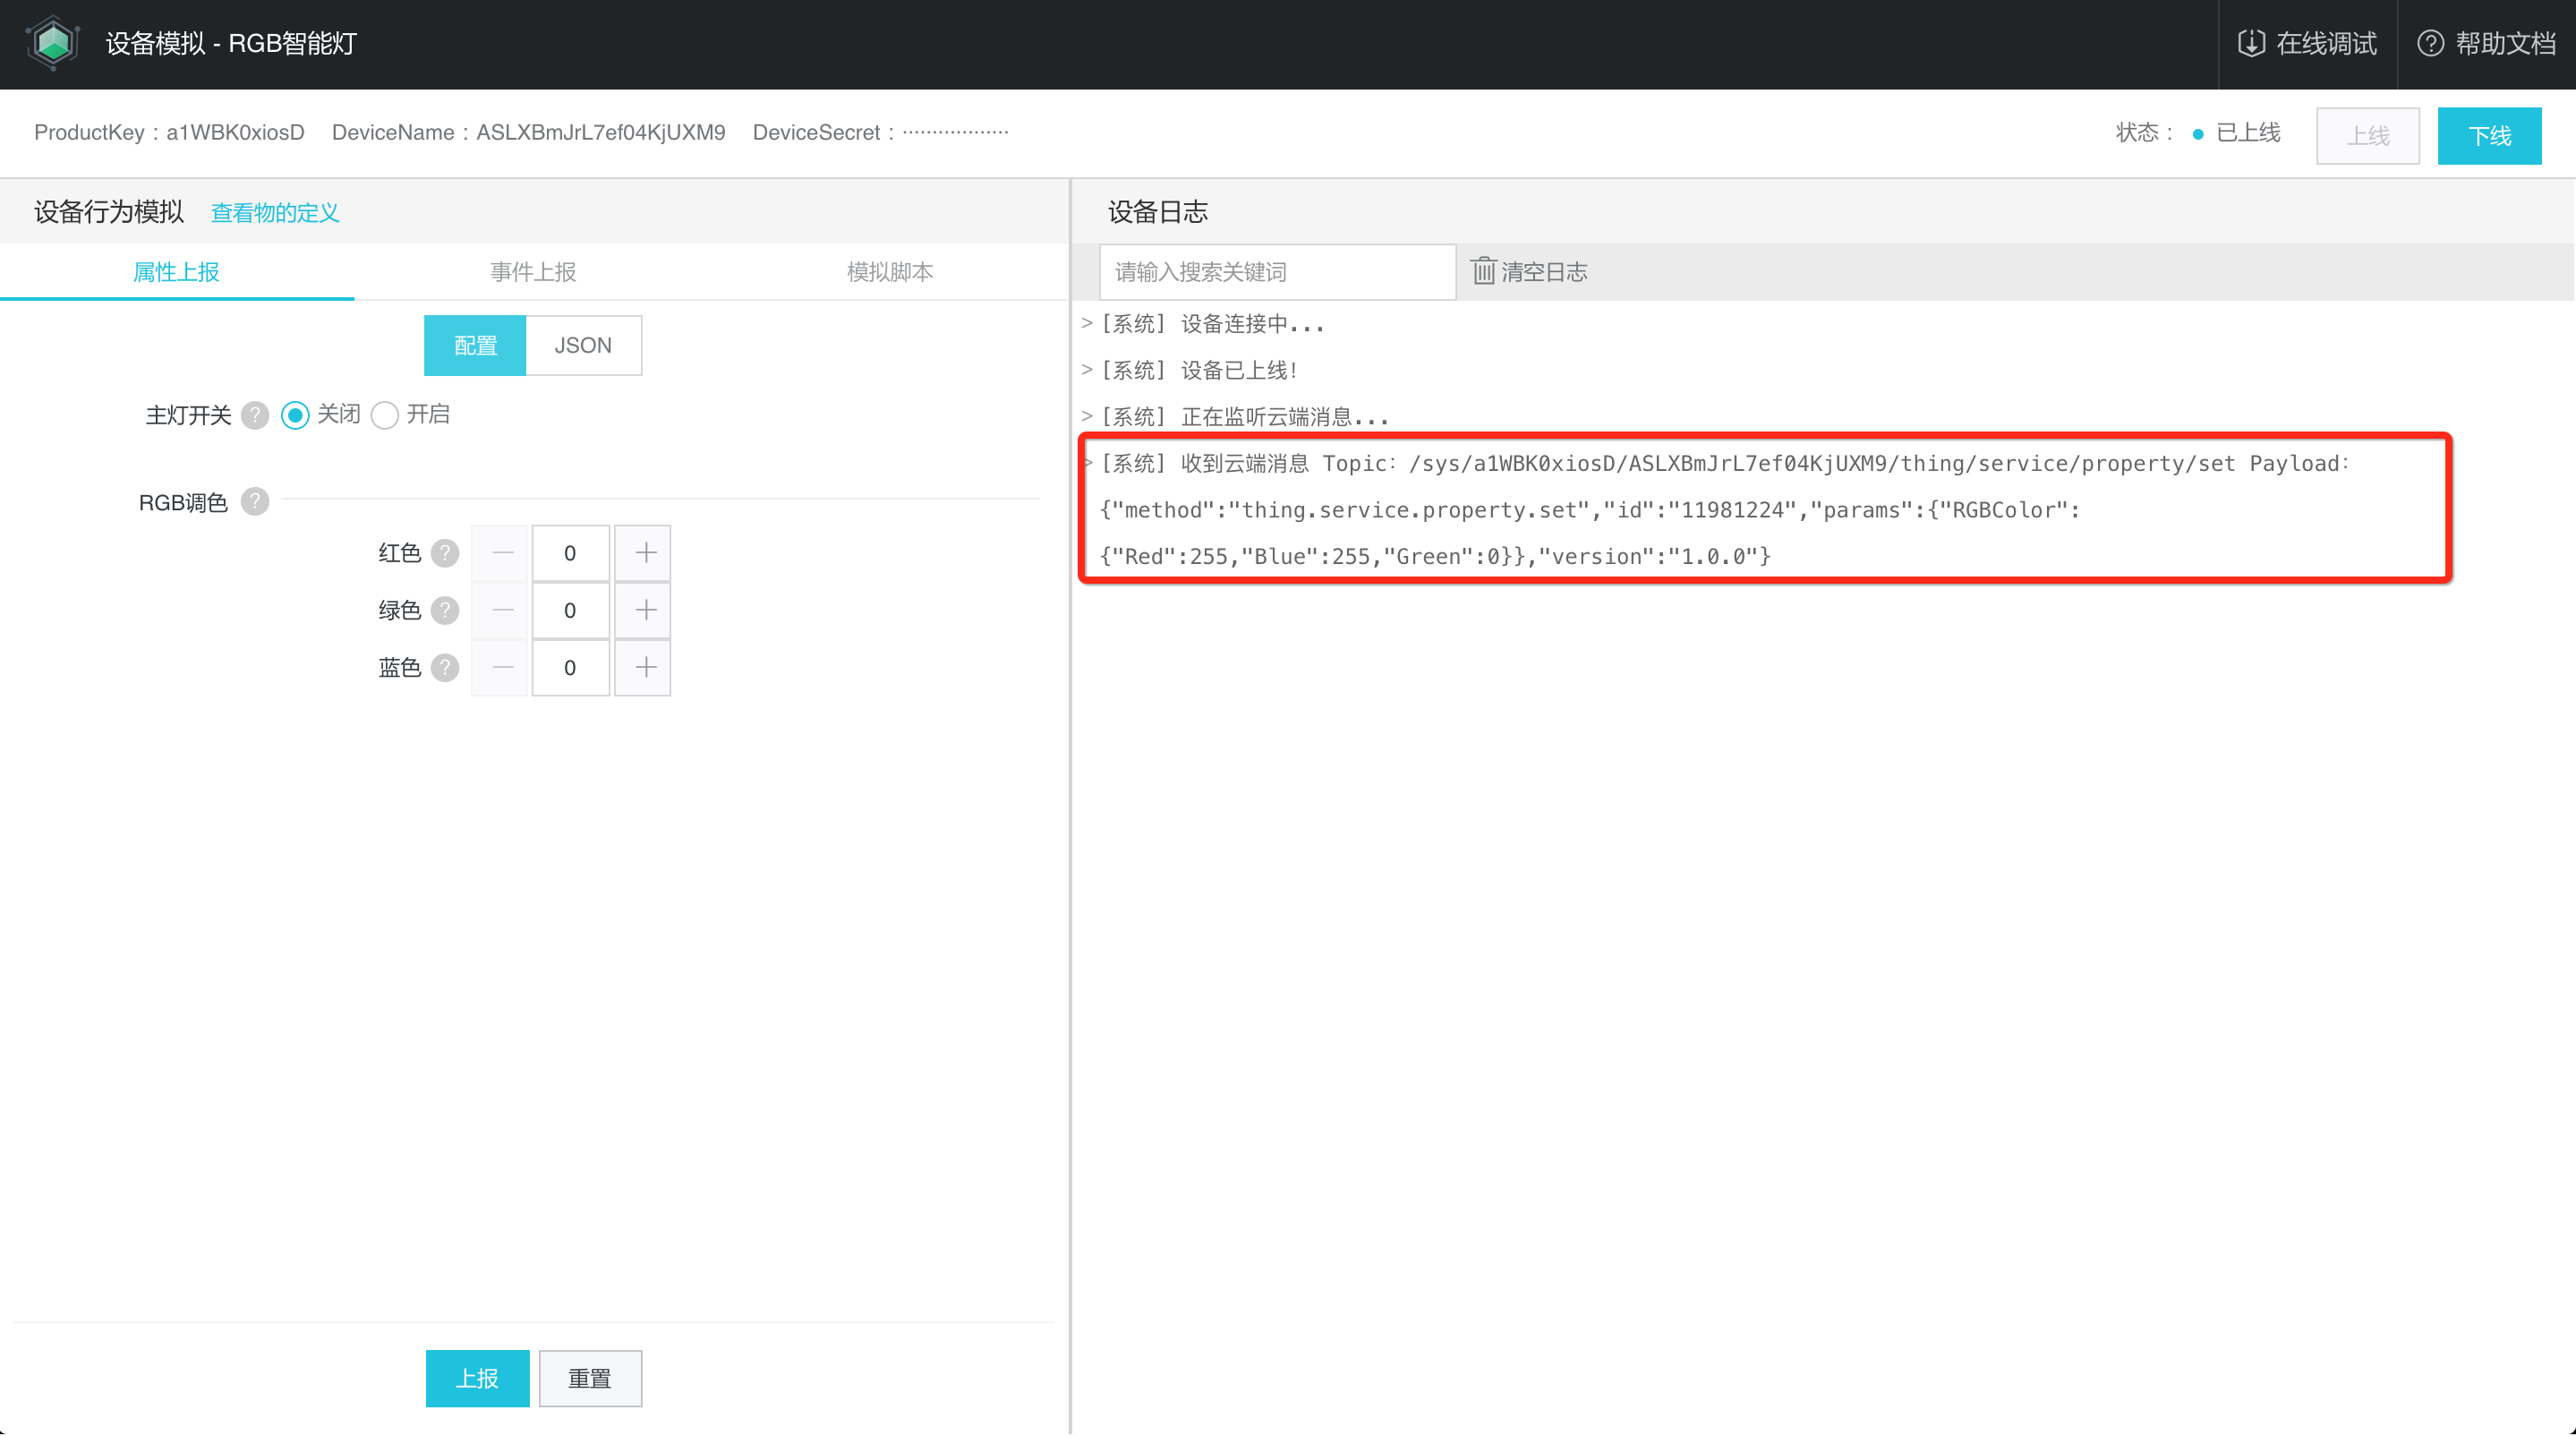
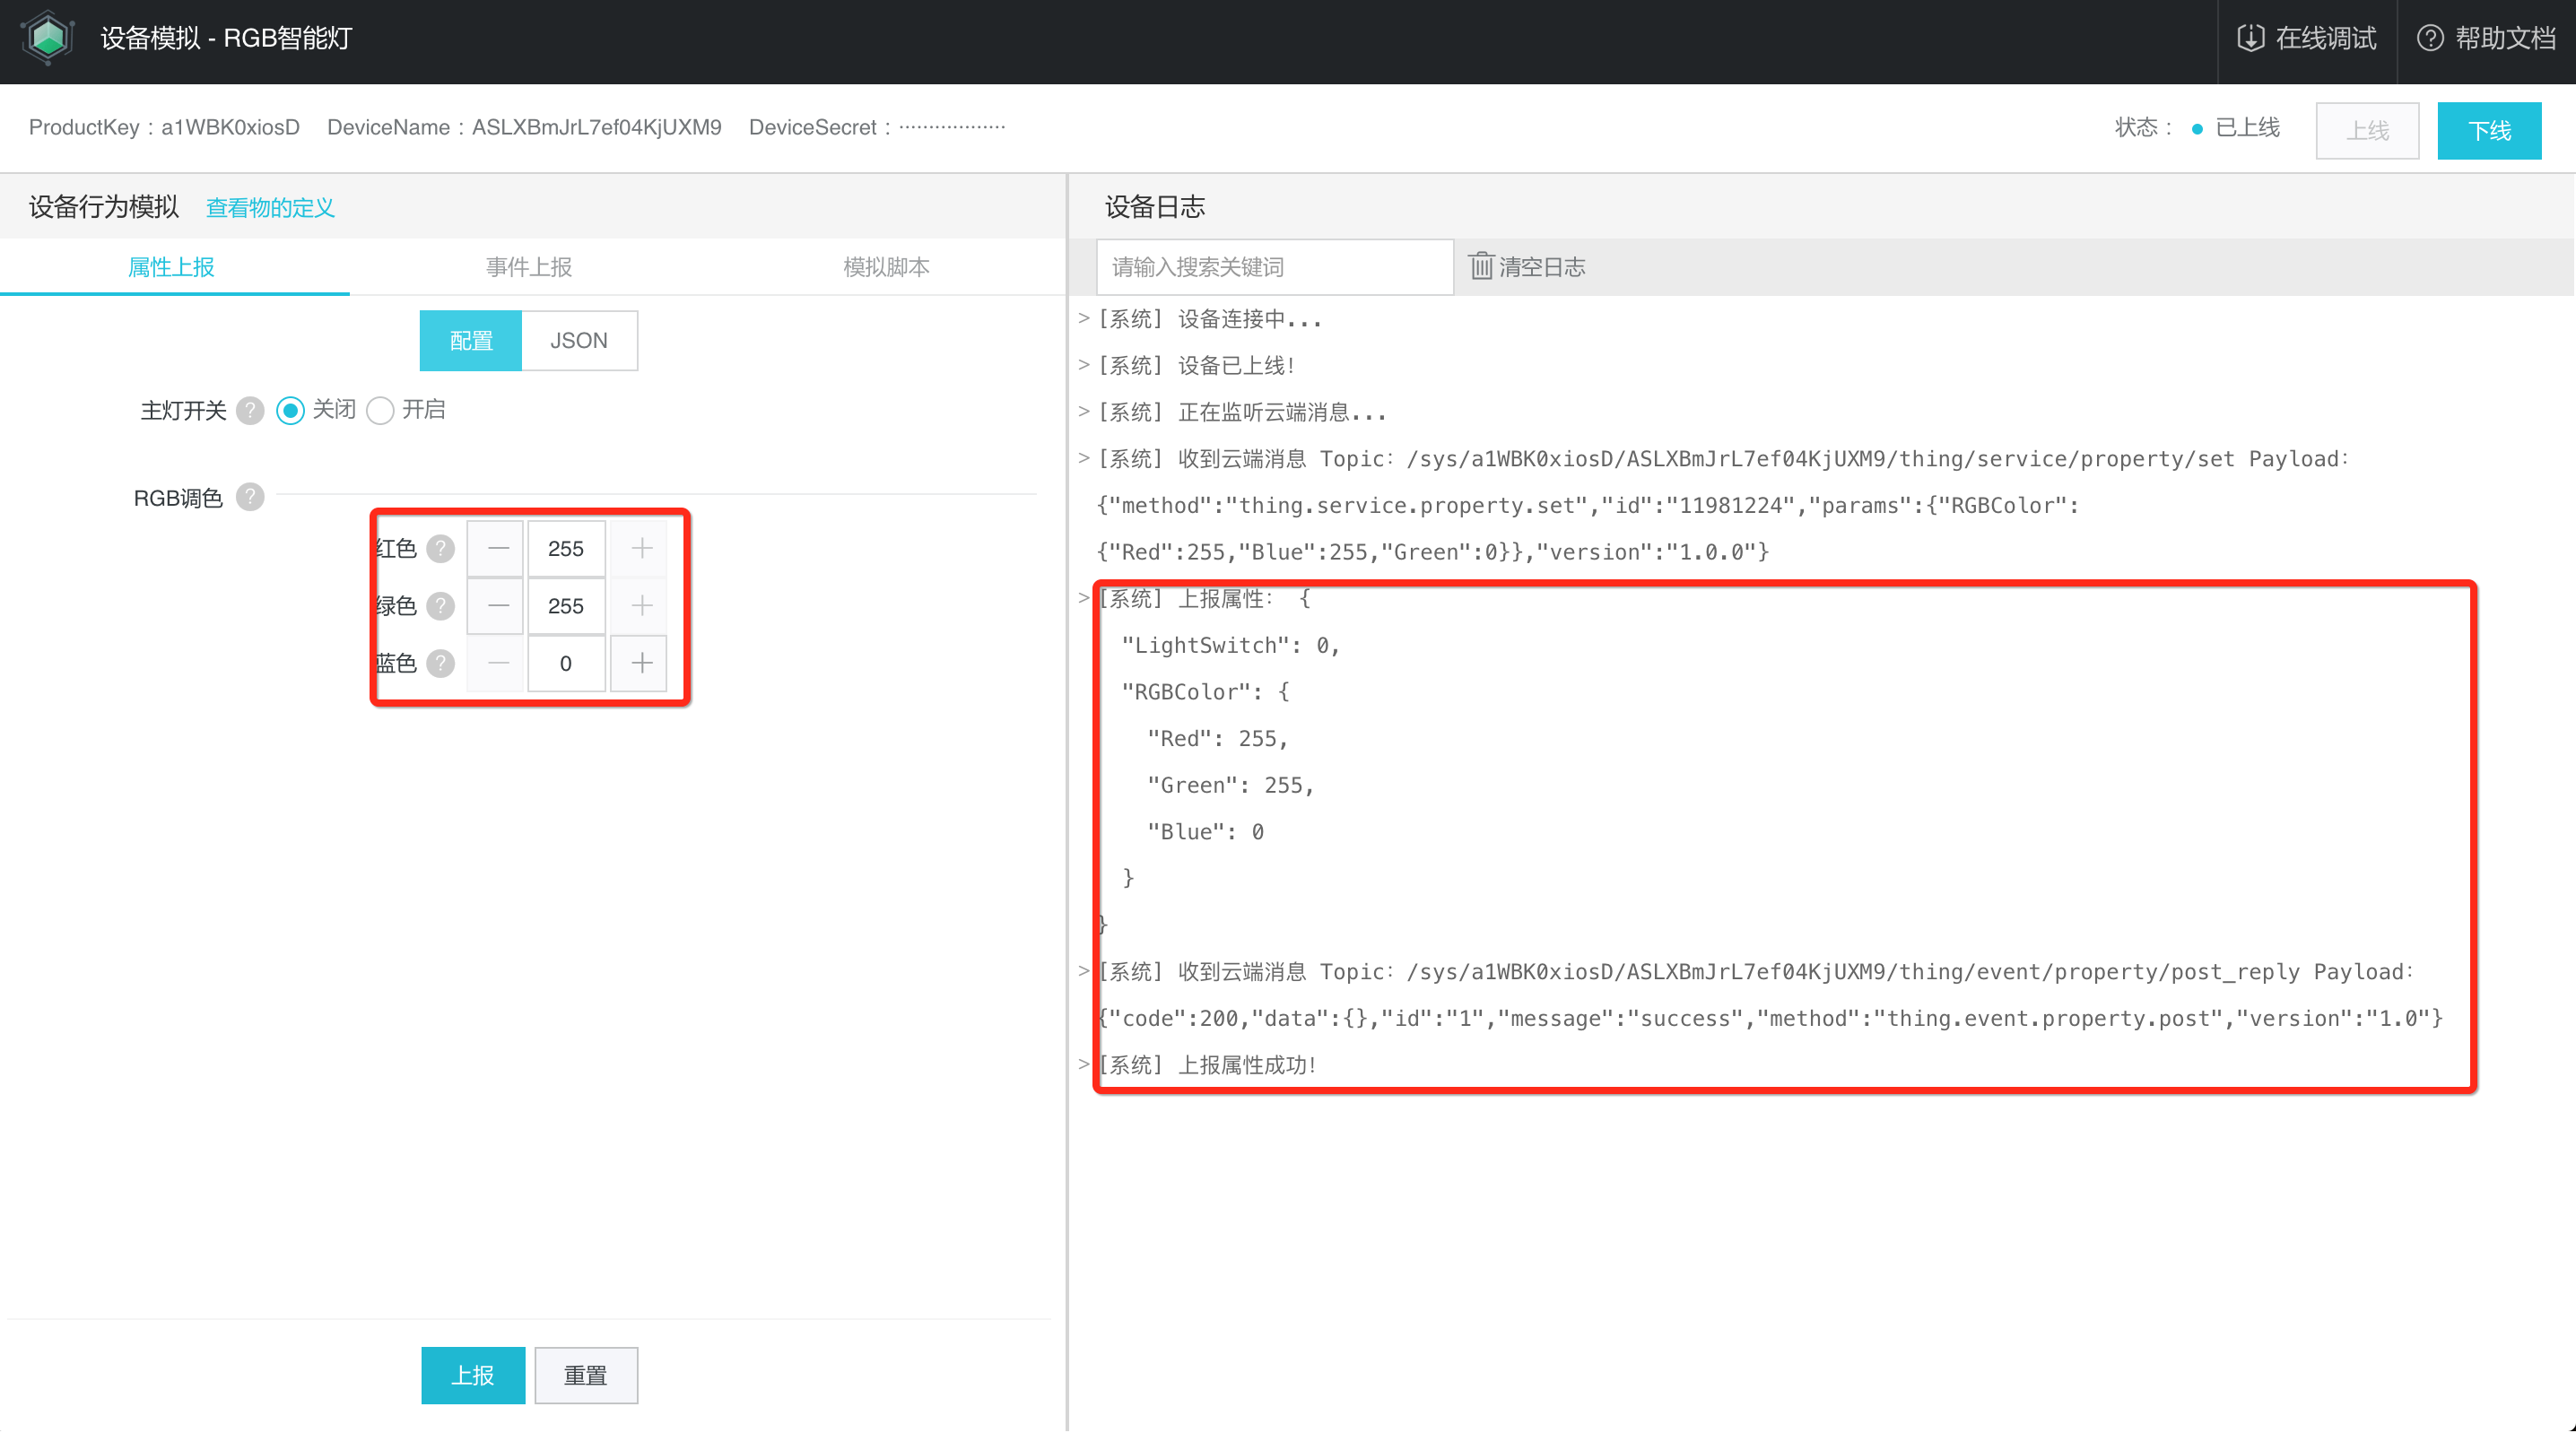
将模拟设备的 RGBColor 属性值改成(255,255,0),点击“上报”,在右侧可以看到设备上报属性成功的消息:
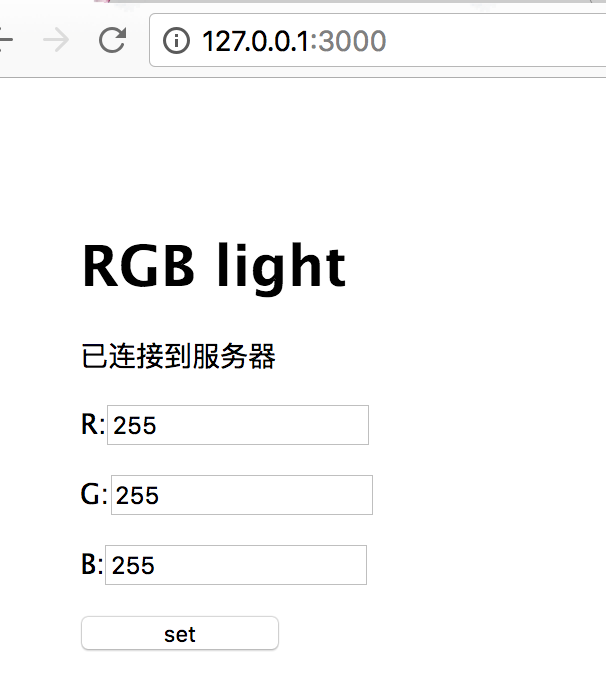
这时候我们再打开 http://127.0.0.1:3000/ 应用页面,发现属性输入框已获取到最新的值(文案已变成“已连接到服务器”):
至此,第三方应用的开发就完成了,那么恭喜你完成了 IoT 应用端到端的全链路开发!
应用发布
目前 Link Develop 没有提供服务端应用的托管能力,请购买阿里云 ECS 或者第三方服务器进行应用托管发布。
注意事项
若出现 “RBAC鉴权失败,没有访问此api的权限 api:1533”, 请确保阅读完(https://yuque.com/linkdevelop/quickstart/exkbdk) 这篇文章的内容。这种情况一般是“物的管理服务”没有开启。
如果设置的时候遇到服务异常,注意字段的校验(如 int 和 string 需要区分开来)。